No products
Categories
- WVO Waste Motor Oil Algae Centrifuges
- Algae Centrifuge for Algae Harvesting
- Automatic Centrifuge Controllers
- Biodiesel Centrifuges
- Explosion Proof Centrifuges
- High Speed Centrifuges, Decanters and Oil Water Separators
- WMO Centrifuge - Waste Motor Oil Centrifuge
- WVO Centrifuge - Waste Vegetable Oil Centrifuge
- Oil Transfer Pump
- Waste Motor Oil Pumps, WVO Pumps, Oil Transfer pumps, Industrial Oil Pumps
- Oil Transfer - Meters,Tanks, Hoses, Nozzles and Fittings
- Media Filtration - Bag Filters, Filter Housings, FIlter Heads
- Electric Oil Transfer Pump and Centrifuge Motors
- Filter Heaters, Battery Heaters, Drum Heaters
- Waste Oil Heater and Waste Oil Burners
- How-to Books
- Parts / Accessories
- Centrifuge Applications
- Make Black Diesel
- Comparing Centrifuges RPM vs. RCF
- Lab Reports US Filtermaxx Centrifuge
- Centrifuge Feeding Systems
- Gravity Feed Centrifuge
- Centrifuge Feed Rates
- Estimating Flow Rate
- Causes of Centrifuge Vibration
- One Pass Oil Cleaning, Estimating Run Time
- P-trap Centrifuge Output
- Centrifuge Piping Schematic
- Electrical Wiring for Centrifuge
- US Filtermaxx General Centrifuge Assembly
- VFD Programming
- Centrifuging Low Flashpoint Liquids
- Selecting the Proper Oil Pump
- US Filtermaxx Oil Burner Manual
- Centrifuge floor space requirements
What's New and BLOG
US Filtermaxx
Leg Type Centrifuge Assemby

Thank you for purchasing a US Filtermaxx centrifuge.
Handling of fuels and rotating machinery is hazardous. Follow all applicable ordinances regarding handling and storage of fuels, equipment grounding and disposal of centrifuge waste. Filtermaxx LLC is not liable for unlawful use or disposal of waste products.
Please read and understand these instructions before use.
Warranty:
Filtermaxx LLC will repair or replace any part deemed to be defective by Filtermaxx LLC for one year from the date of purchase. Defective parts must be returned to Filtermaxx LLC for inspection. Judgement by Filtermaxx LLC is final. Warranty does not cover shipping charges to or from the Filtermaxx facility. Filtermaxx LLC does not guarantee this product is suitable for any purpose what so ever and is not responsible for any loss or damage from use of this product. Filtermaxx LLC is liable for replacement of defective parts only.
Engineering inquires: steve.chastain@usfiltermaxx.com
US Filtermaxx LLC
PO Box 600711
Jacksonville Fl 32260
USFiltermaxx.com
This Manual Contains Copyrighted Material. Used With Permission.
Electrical Requirements
All motors start best on 240 volts and this is the preferred voltage.
3/4 hp motors are usually wired for 120 volts.
All other motors are wired for 240 volts.
Motors may be rewired for different voltage as seen on page 9 of the Manual
DO NOT USE EXTENSION CORDS ON THE MOTOR
Due to the high starting current, extension cords cause the staring capacitors to over heat, burning up the motor. This condition is NOT covered by warranty.
ALL WIRING SHOULD BE 12 AWG.
Motor Currents amps @ 120/240 v
HP No Load Full Load Locked Rotor
3/4 7.34 / 3.67 11 / 5.5 55 / 32
1 9.06 / 4.53 13.6 / 6.8 75 / 43
1.5 10.14 / 5.07 15.2 / 7.6 120 / 65
Centrifuge Parts:
OUTPUT VALVES ARE NOT USED AFTER 2006


.
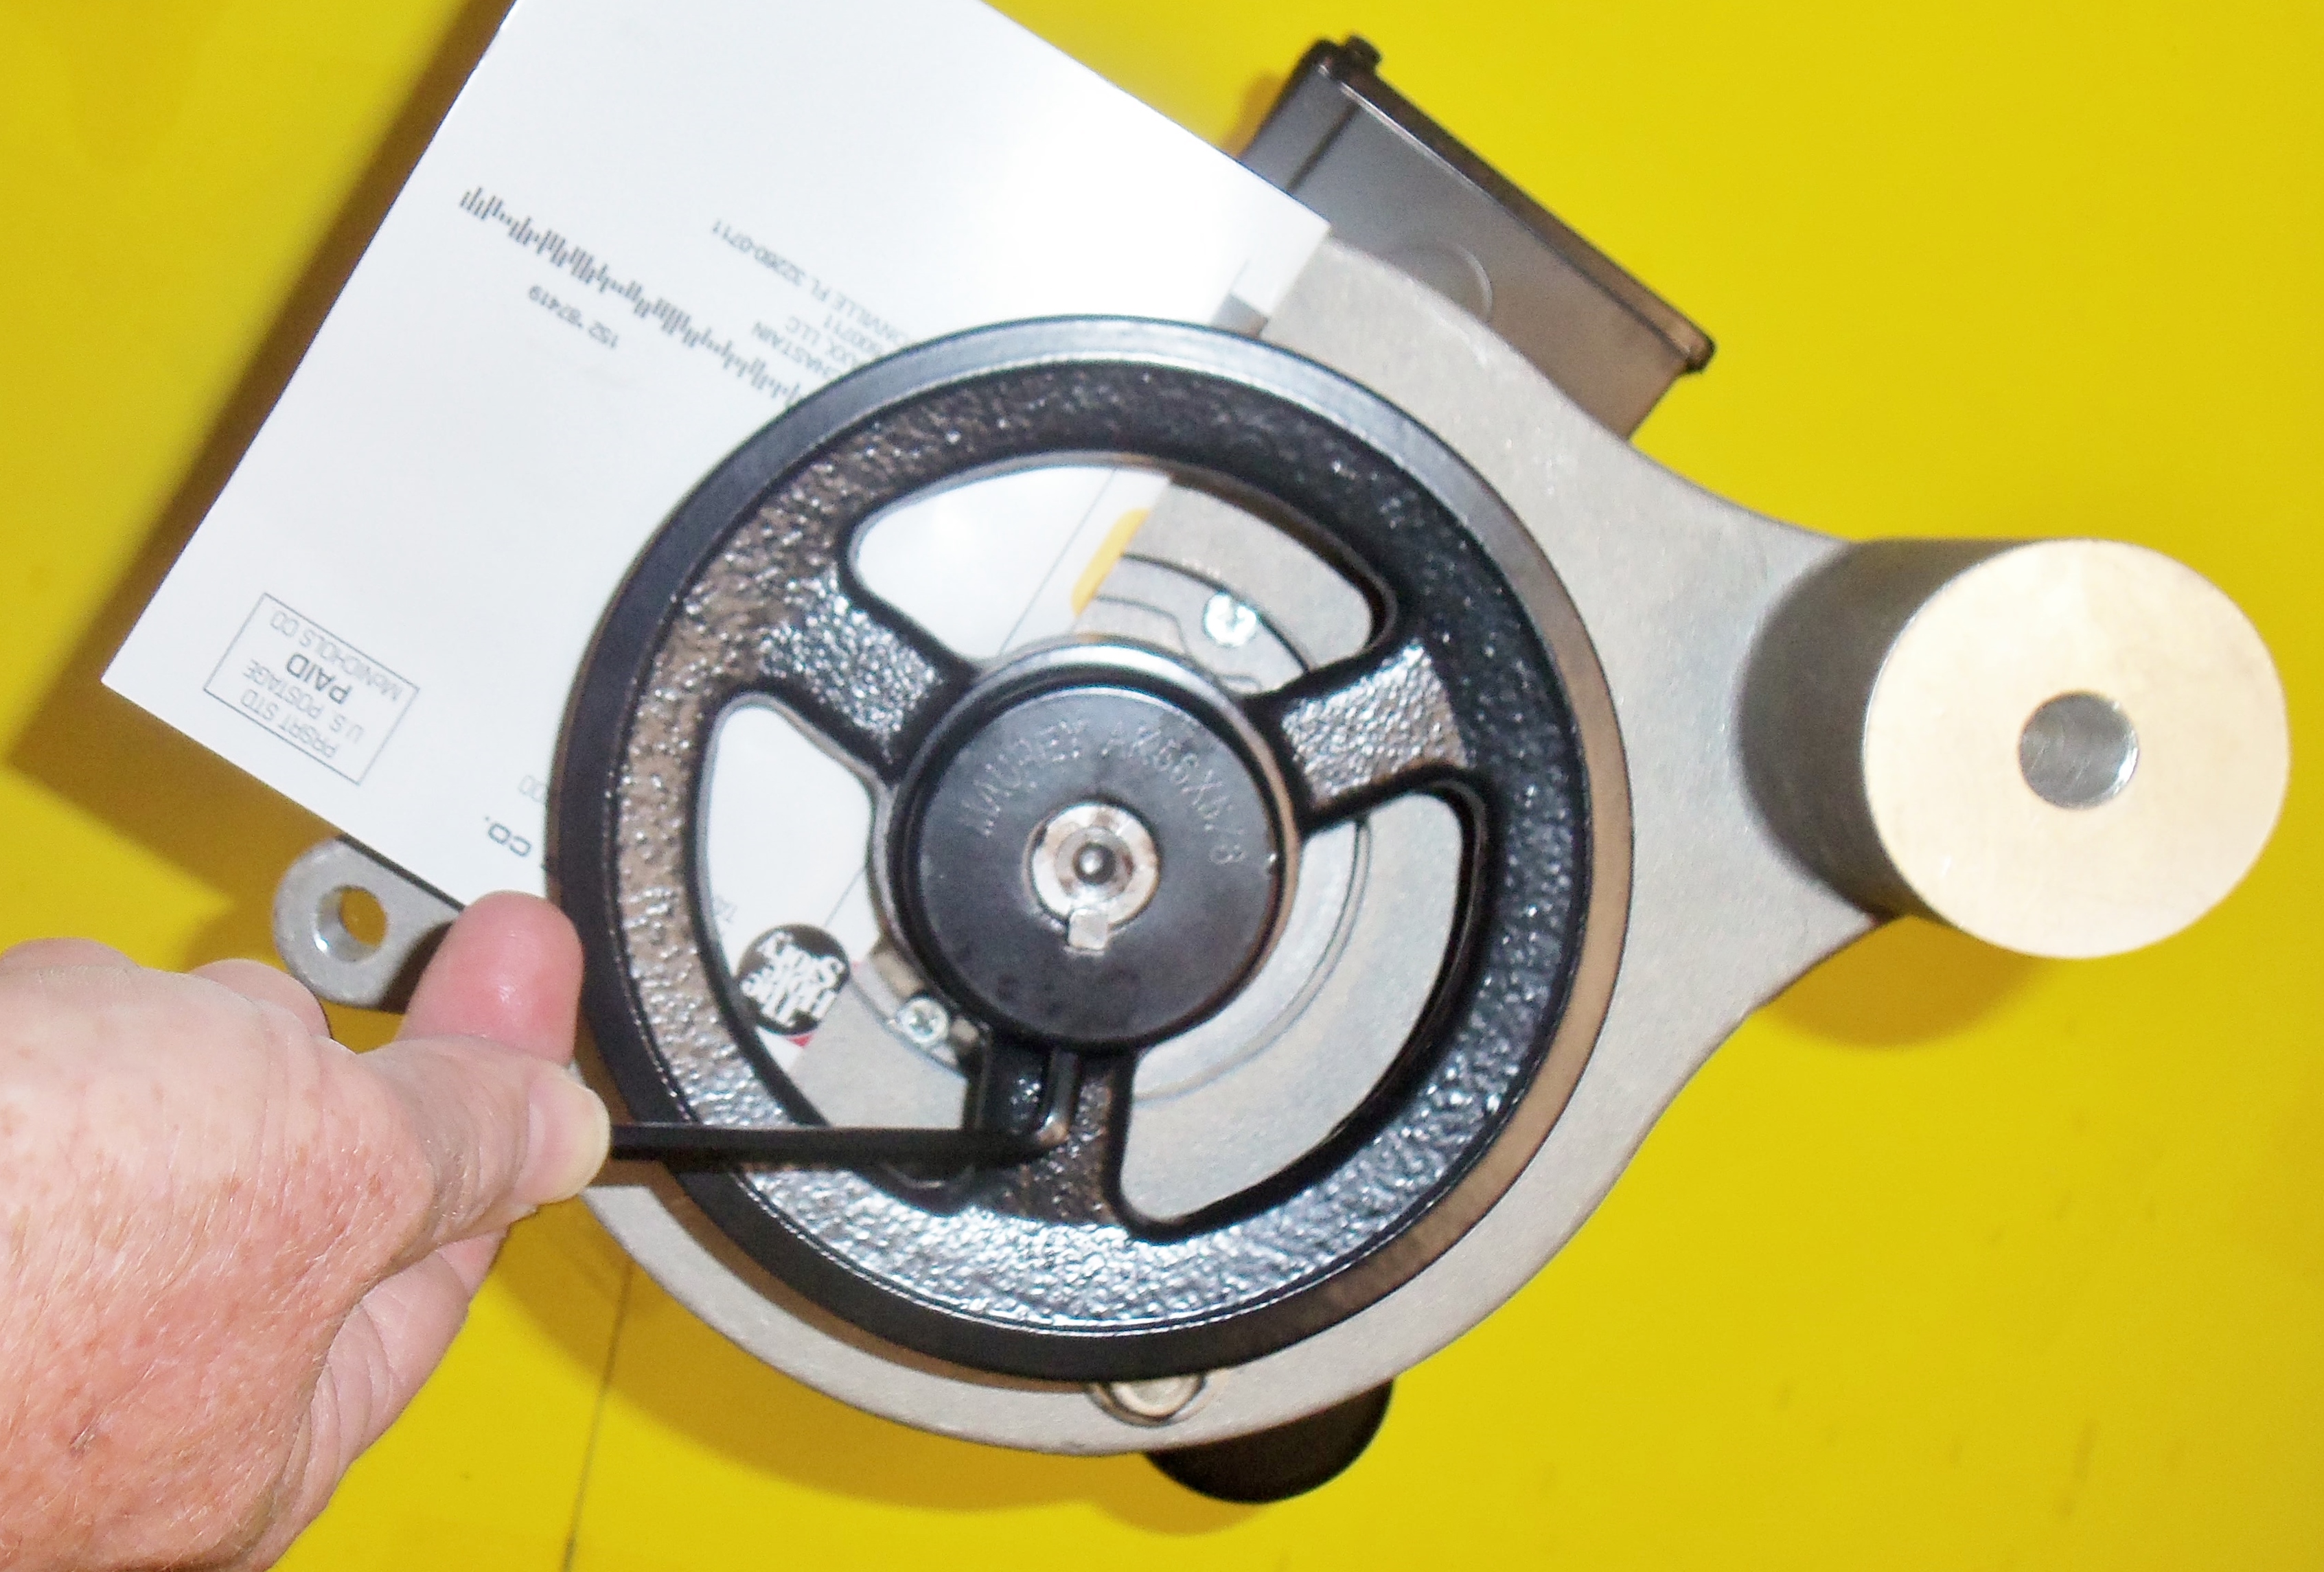
Back view
Assembly:
1. Wrap the motormount stud and leg bolts with at least 8 turns of teflon tape.

2. Insert Motor mount stud into centrifuge base and tighten using a vise grip

3. Attach legs with ½ inch bolts and lock washers.

4. Tighten Leg bolts.

5. Set motor mount plate on motor as shown.

6. Insert three 3/8-16 bolts with flat washers and lock washers. Tighten Bolts.

7. Place a shim over the bolts. Folded card stock like junk mail works well.

8. Press the pulley down until it just touches card stock. Tighten Set screw. Remove
card stock. Do not hammer the cast iron pulley. This is a tight fit. However small burrs
may make this very tight and should be removed with a file.
9. Wire motor for 120 or 240 volts as needed. Use 14 ga wire for 240 volts. Use 12 ga wire for 120 volts.
CHECK MOTOR PLATE FOR WIRING

10. Attach belt tensioning arm and bolt as seen in “Back” photo
“fan end” like when attaching the pulley.
12. Pick up centrifuge and set the centrifuge over the motor, inserting the motor mount stud through the ½ inch diameter motor mount bolt hole.
13. Raise the motor and Insert a block of wood under it so that the ½ inch nut, lock washer and flat washer may be put on the stud. Tighten the nut so that the motor mount boss touches the centrifuge base.
14. Attach the belt over the small pulley.
15. Take up the slack in the belt using the belt tightening screw. The belt should be snug with about 1/4 inch deflection at 10 pounds pressure A loose belt will slip on the pulley causing the spindle to overheat.
16. Grasp the motor pulley and rotate it, spinning the bowl by hand to be sure that it turns freely. Tighten the motor mount bolt.
DO NOT Disassemble Bowl. This destroys the precision balance, creates a hazardous condition and voids warranty. If the bowl has been disassembled, the centrifuge must not be run.
DO NOT Use Valves or Block the Output Flow in any way. This causes flooding.
DO NOT Flood the Centrifuge. This creates a hazardous condition and voids warranty.
MOUNTING:
The centrifuge must NOT be hard mounted. This will tune the centrifuge legs to a natural frequency causing extreme vibration. It is best mounted on rubber pads or vibration isolators available at USFiltermaxx.com

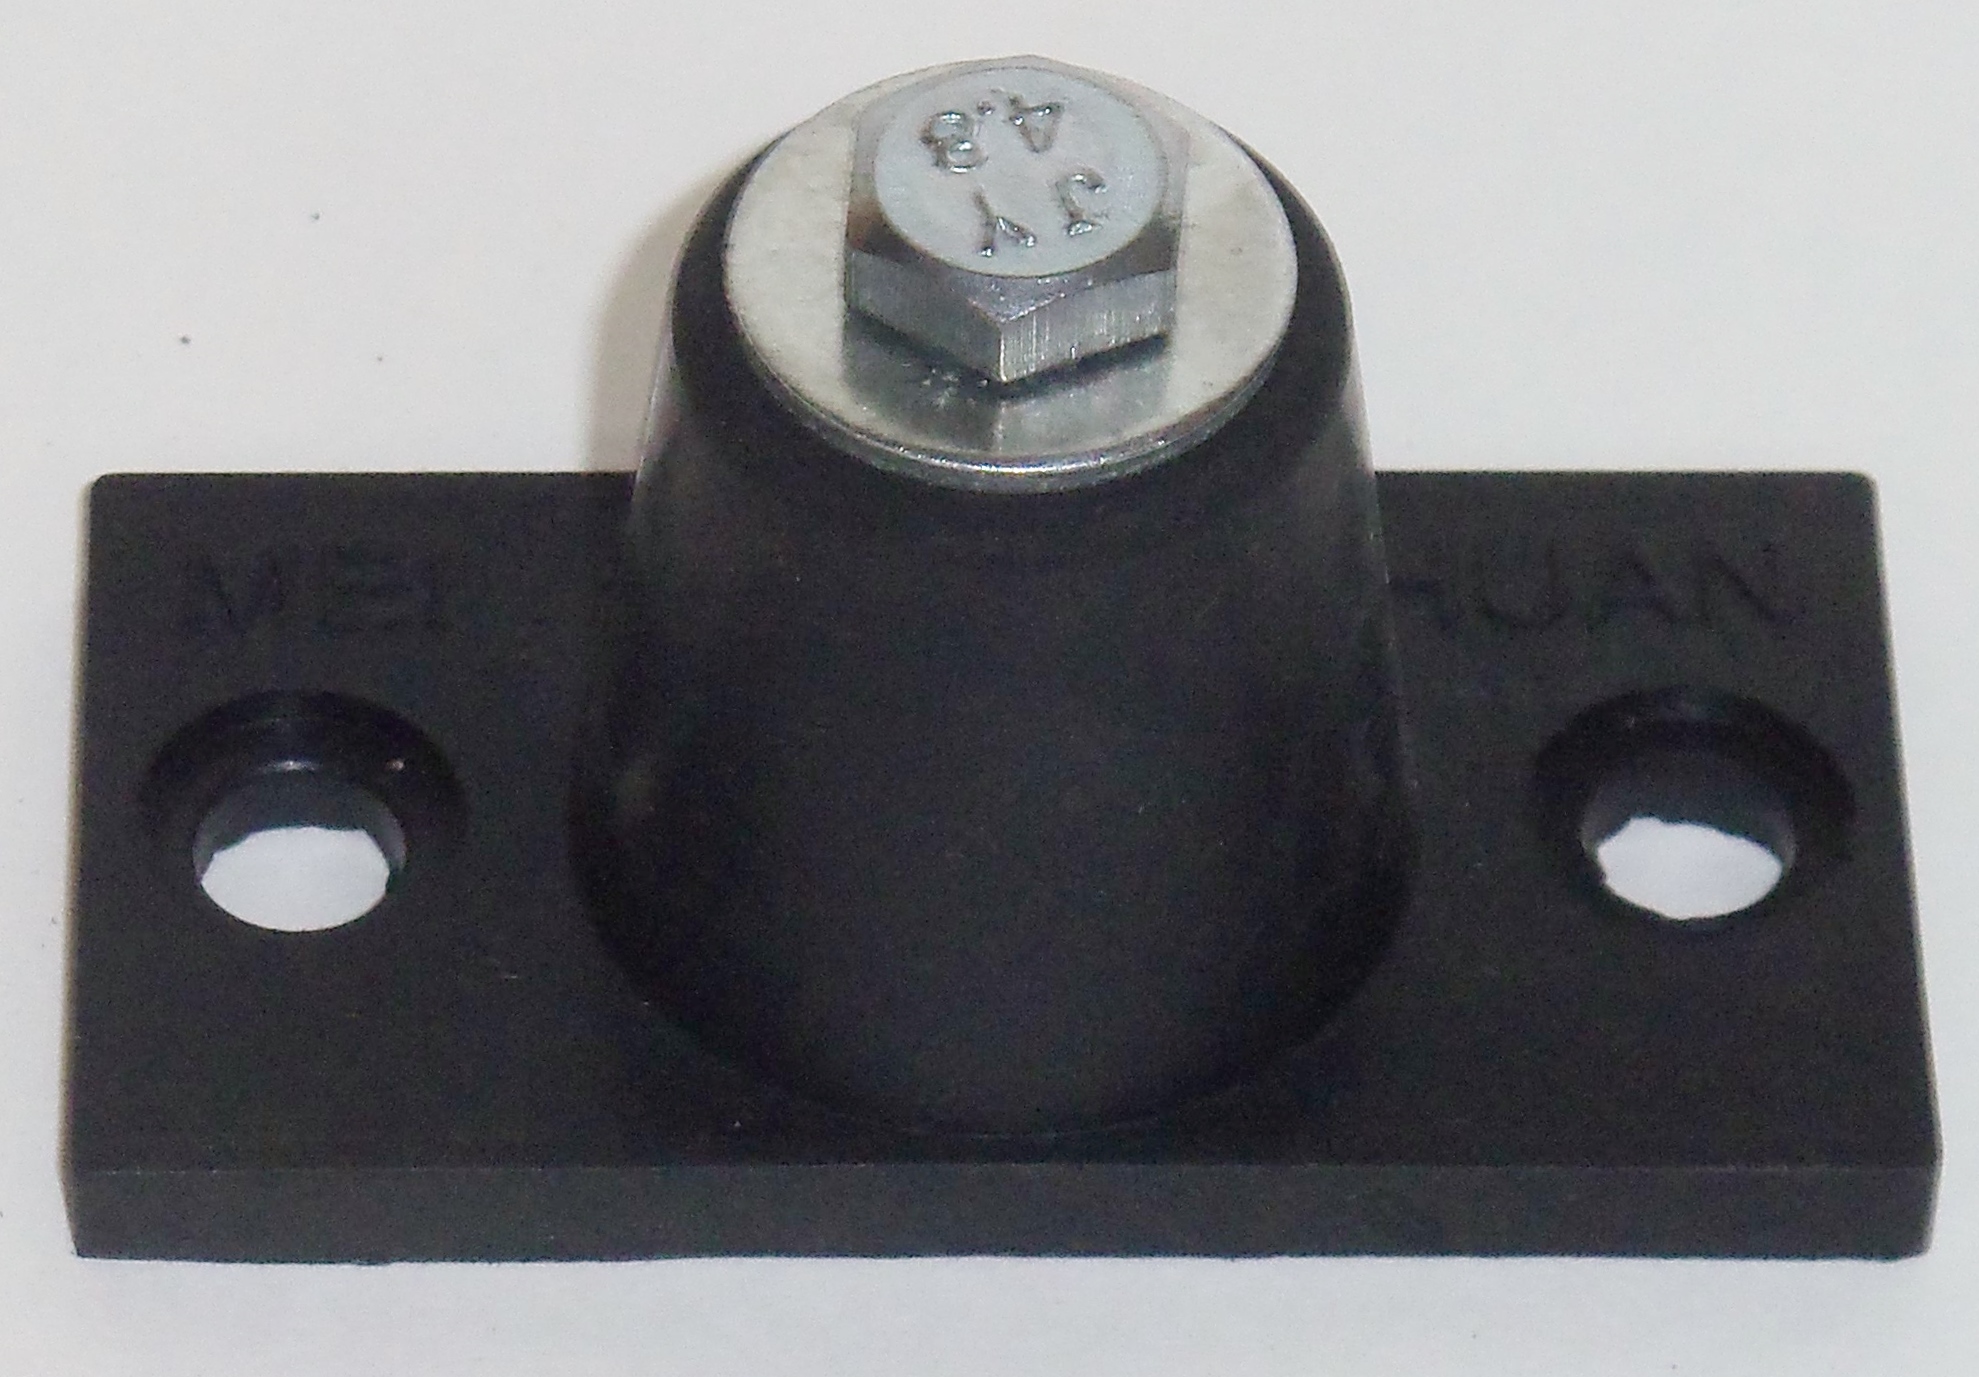
If vibration isolators are not available, the centrifuge may be mounted on a rubber pad as seen on the left.
The centrifuge must be free to move on the mounting and not tightly bolted to the surface.
Troubleshooting:
Rattles or Vibration:
Loose spindle Tighten spindle lock
Loose Pulleys Tighten pulley set screws-
Be careful not to strip the aluminum threads by over tightening.
Centrifuge Flooded Stop Centrifuge and remove blockage from output. Reduce input flow.
Fan Cover loose Tighten sheet metal fan cover on motor
Motor mount loose Tighten motor mount bolt
Legs rigidly bolted to an uneven surface. Use rubber pads under the legs.
Tighten only 1 leg bolt leaving the other two only finger tight. Over tightening can actually “tune” the centrifuge
to a natural frequency causing severe vibration
2. Centrifuge Stutters upon start up:
Belt is loose Tighten Belt
Centrifuge runs for a while then blows breaker upon restart:
Breaker too small or weak.
20 amps required for cycling operation. 15 amps may start and run the centrifuge, but is too small for restart.
Centrifuge will not start
Bowl jammed Remove jam. Reposition bowl so that it spins freely
Circuit breaker blown Determine cause of blown breaker, then reset.
Motor and capacitor heat up upon starting. No more than 4 starts per hour allow capacitor to cool between starts.
Capacitor bad
Capacitor oil leaks out upon over heating. Replace capacitor. This is a sign of undersize wire or overload.
5. Motor runs hot : Bowl Dragging. Check clearance at spindle.
Centrifuge is flooding. Feed rate too high. Drain
Clogged or undersized. 1 inch minimum hose diameter
See Technical Articles at USFiltermaxx.Com for further information.